Monday, 17 June 2013

Classic 60s polo neck sweater

Steve Winwood in the original sweater
As usual I've been too busy knitting to write up my patterns - I really must make more effort! This sweater was made for a friend who's very much into the 60s Mod look, even though he's about 25 years too young to remember it! He'd asked me if I could make him a sweater like one he'd seen Steve Winwood wearing in a photo taken in about 1965, when Steve was with the Spencer Davis Group. (Who else remembers them? Come on, own up!). 
I've made a couple of minor changes - it looks as though the original was in Aran/worsted weight, which was a little heavy for Paul if he wanted to wear it on stage (he's the guitarist in a 60s tribute band, The Beat Rooms), so I used Jarol Heritage DK, which has a high wool content and is therefore more authentic than synthetic fibres. I also changed the shoulder line slightly as the dropped shoulder of the original would be uncomfortable under a jacket. Here's the pattern - it's very simple, with a cable repeat every 14 rows on both front and back.

Please note error in sleeve pattern now corrected 6 March 2014

Classic 1960s polo neck sweater


My version of Steve's sweater

Materials:


700g Jarol Heritage DK – I used shade 100 Cream.

Pair size UK 10/3.25 mm needles

Pair size UK 8/4 mm needles

Set of size UK 9/3.75 mm double point needles for polo collar

Cable needle

2 stitch holders or spare needles


Measurements:


To fit chest 40” to 42” (actual measurement 44”)

Length 28”

Sleeve seam 19” plus turnback cuff

Back width across shoulders (between sleeve set-in seams) 16”


Tension:


22 sts and 30 rows to 4” measured over stocking stitch on 4 mm needles.

Abbreviations:


K
knit
K2in
Inc 1 st by knitting into back and front of same st
P
purl

st st
stocking stitch
rem remaining
patt pattern RS right side
tog together WS wrong side
st(s) stitch(es) C8F slip next 4 sts onto cable needle, place at front of work, K next 4 sts, then K 4 sts from cable needle
inc increase
dec decrease
alt alternate


Back:


Using 3.25 mm needles, cast on 119 sts and work 3” (22 rows) rib as follows:

1st rib row: (K1, P1) to last st, K1.

2nd rib row: K1, (K1, P1) to last 2 sts, K2.

Inc row: Rib 4, (K2in, rib 11) 9 times. K2in, rib 6 (129 sts).

Change to 4 mm needles and work 14 row cable pattern as follows:

Marker added on cable row
1st, 3rd and 5th (RS) rows: (K35, P2, K8, P2) twice, K35

2nd and alt (WS) rows: (P35, K2, P8, P2) twice, P35

7th row: (K35, P2, C8F, P2) twice, K35 – place a marker on this row (a length of contrasting yarn will be fine).

9th, 11th and 13th rows – as 1st.

Repeat these 14 rows until work measures 18” or desired length to start of armhole decreasing. Move the marker to each new cable patt row as you work it.
Armhole shaping: Keeping continuity of cable pattern, cast off 4 sts at start of next 2 rows. Dec 1 st at each end of next 7 rows, then each alt 6 (RS) rows (95 sts rem).

Work straight until work measures 9½” from start of armhole decreasing, i.e. 27½” in total.

Shoulder shaping: Cast off 9 sts at start of next 4 rows, then 10 at start of nest 2 rows. Place rem 39 sts on stitch holder for neck.


Front:


Work as for back to end of armhole shaping. Work straight until work is 18 rows shorter than the back to start of shoulder shaping, thus ending with a WS row.

Divide for neck: Work 35 sts, turn, P2 tog and work to end. Working on these 34 sts only, dec 1 st at neck edge on next 3 rows, then on next 3 alt (RS) rows (28 sts).

Work 7 rows straight. With RS facing, cast off 9 sts at start of next and foll alt rows. Work 1 row. Cast off rem 10 sts.

Place centre 25 sts on stitch holder. Rejoin yarn to rem sts and complete other side of neck to match.


Sleeves (make 2 alike):


Using 3.25 mm needles, cast on 59 sts and work 5” (40 rows) rib as for back. If you prefer to omit the turnback, work 3” (22 rows).

Inc row: Rib 5, (K2 in, rib 7) 6 times, K2 in, rib 5 (66 sts).

Change to 4 mm needles and. working in st st throughout, inc 1 st (K2 in) at each end of 7th row and each following 8th row until there are 92 sts.

Work straight until work measures 21” (or 19” if you are omitting the turnback).

Shape top: cast off 4 sts at start of next 2 rows. Dec 1 st at each end of next and foll alt (RS) rows until there are 40 sts left. Dec each end of every row until 28 sts are left.

Cast off 3 sts at start of next 2 rows. Cast off rem 22 sts.
Back of sweater also has cable pattern


Polo collar:


Join shoulder seams.

Using 3.75 mm dpns or circular needle, and starting at left shoulder seam, pick up and knit 22 sts down left front neck, K across 25 sts from centre front, pick up and K 22 sts up right front neck, and finally K across 39 sts from back neck (108 sts). Work 6½” K1, P1 rib. Cast off loosely – use a needle 1 or 2 sizes larger.


Finishing:


Press pieces according to ball band instrucions. Set in sleeves, then join side and sleeve seams. Don't forget to stitch the lower 3” of the sleeve ribbing from the other side, as the cuffs will be turned back in wear. Press seams.


Thursday, 4 April 2013

Fair Isle – the fourth time around (at least)

Paul in his Magical Mystery Tour sweater
My Fair Isle waistcoat
It's true what they say – if you keep something long enough it will come back into fashion. This is certainly true of Fair Isle sweaters – they were popular in the 1940s, probably because wool (and it was wool!) was in short supply, so odd bits left over from other projects could be used up. I remember knitting my first Fair Isle in the late 60s, from a pattern based on a pullover worn by Paul McCartney, and when I saw The Beatles' Magical Mystery Tour, in which Paul sports another of his Fair Isle pullovers, again last year it got me thinking about knitting Fair Isle. Alas, the pattern and the pullover are long gone, but I found an old glove which I know I knitted in the same pattern, charted it and produced this long waistcoat. The basic waistcoat pattern was from a 1970s Falcon booklet. I'm including the chart, you can use it for any plain stocking stitch (stockinette) pattern but remember to centre the Fair Isle design on the pieces and bear in mind that you will probably need to use a size larger needles (or knit a size bigger) as stranded knitting tends to come up narrower than plain, and stretches less.


There are plenty of vintage patterns around for the good old Fair Isle sleeveless pullover, like this one reproduced on the Free Vintage Knitting site, but they are almost always designed to use 3-ply. OK, you could use modern 4-ply, such as Jarol Heritage, which is 50% wool and knits up pretty much like old 3-ply, but most people these days prefer something a bit thicker (and quicker!). 
There was another brief Fair Isle revival in the 80s, when I made a lot of stranded designs on the knitting machine - long since consigned to the garage as being too much trouble – you can't watch TV when you're using it, and the noise makes it pretty antisocial, not to mention the space it takes up.

In the last couple of years Fair Isle has made a big comeback, so if like me you have boxes full of leftover bits of DK in every colour under the sun, this is for you! You do need to make sure that the yarns you use all have similar fibre content, so I tend to stick to 100% acrylic – it's cheap, the colours don't run and it's easy to wash.

This is my basic V-neck sleeveless sweater, using a stitch pattern I used in the 80s in another long-lost sweater (I still have the matching hat!), but you could use any Fair Isle stitch pattern. Sheila McGregor's Traditional Fair Isle Knitting is a great source for patterns, or you could have a go at designing your own. I use MS Excel for charting, there's an excellent tutorial on Marnie Maclean's blog here.

V neck Fair Isle sweater instructions


Oops! forgot to include the centre front decrease instuctions when I posted this - error now corrected!  

Correction to tension 31 May 2013

Materials:


Woolcraft New Fashion DK and/or Sirdar Hayfield Bonus DK (both 100% acrylic), or any suitable yarn that knits to the same tension:

Allow 150g main colour (dark grey) and 50g of each of 6 contrast colours.

Pair size UK10/3.25 mm straight needles

Pair size UK8/4 mm straight needles

Size UK10/3.25 circular needle or set of double pointed needles


Measurements:


To fit up to 42” (107 cm) bust/chest (actual measurement 44”/112 cm)

Length 25”/63.5 cm


Tension:


24 sts and 28 rows to 4”/10 cm on larger needles.


Chart shows 12-st repeat plus 1st stitch

Abbreviations:


K        knit
P        purl
st st   stocking stitch
patt    pattern
tog     together
st(s)   stitch(es)
inc      increase
dec     decrease
RS      right side
WS     wrong side
rem    remaining


Back:


Using size 10/3.25 mm straight needles and MC, cast on 133 sts and work 3” in K1, P1 rib.

Change to larger needles and work in st st for 15” (or desired length to armholes), following chart and joining in/cutting contrast yarns as required.

Armhole decrease:

Taking care to keep continuity of patt, cast off 6 sts at start of next 2 rows, then dec 1 st at each end of next 7 rows and following 11 alt (RS) rows (85 sts).

Work straight until work measures 9½”/24 cm, ending with a WS row.

Shape shoulders and neck:

Next row: Cast off 9 sts, work to end of row.

Next row (left side of piece): Cast off 9 sts, P23 (inc loop left after cast off), turn.

Next row: Cast off 3 sts, K to end.

Next row: Cast off 9 sts, P to end.

Next row:Cast off 3 sts, K to end.

Cast off rem 9 sts and fasten off.

Place next 21 sts on a stitch holder for neck ribbing.

Rejoin yarn to rem sts on needle, cast off 3 sts, P to end.

Next row: Cast off 9 sts, P to end.

Next row:Cast off 3 sts, K to end.

Cast off rem 9 sts and fasten off.


Front:


Work exactly as for back until the piece is 15 rows shorter than the back to the armhole shaping, thus ending with a RS row.

Divide for neck: P66, turn and work on these sts for left side of piece.

Dec 1 st at start of next and foll 4th rows. At the same time, when you have worked 16 rows from the start of the neck shaping, cast off 6 sts at the armhole edge. Continuing to dec at the neck edge on every 4th row, dec 1 st at the armhole edge on the next 7 rows, then on the next 11 alt rows.

Continue to dec at neck edge until there are 27 sts left, then work straight until front matches back to shoulder shaping.

Cast off 9 sts at start of next 2 WS rows. Work 1 row then cast off rem 9 sts and fasten off.

Place next st on needle (the centre stitch) on a small safety pin. Rejoin yarn and work other half of front to match the side already completed.


Armhole ribbing:


Join both shoulder seams.

With size 10/3.25 mm straight needles, pick up 129 sts evenly along the front and back of the armhole edge and work 7 rows K1, P1 ribbing. Cast off using larger needle.


Neck ribbing:


With size 10/3.25 mm circular or double pointed needles, pick up sts evenly along the neck edge as follows:
Starting at the right back of the neck, 7 sts down slope at back of neck, 21 from stitch holder at centre back neck, 7 sts up slope at left back neck, 76 down left front, 1 st from safety pin place marker on this st – a short length of contrast waste yarn will do the job), 76 up left front (188 sts).
Work 7 rounds K1, P1 ribbing, working S2KP (double decrease) on centre front three sts on every round. Cast off using larger needle, working the double decrease as on previous rounds.


Finishing:


Press lightly according to ball band instructions. Join side seams and weave in ends – it is best to weave in ends after joining the seams so they can be hidden in the seams. Press side seams.

Tuesday, 12 March 2013

Variation on a theme - another version of the Celtic Cable sweater vest

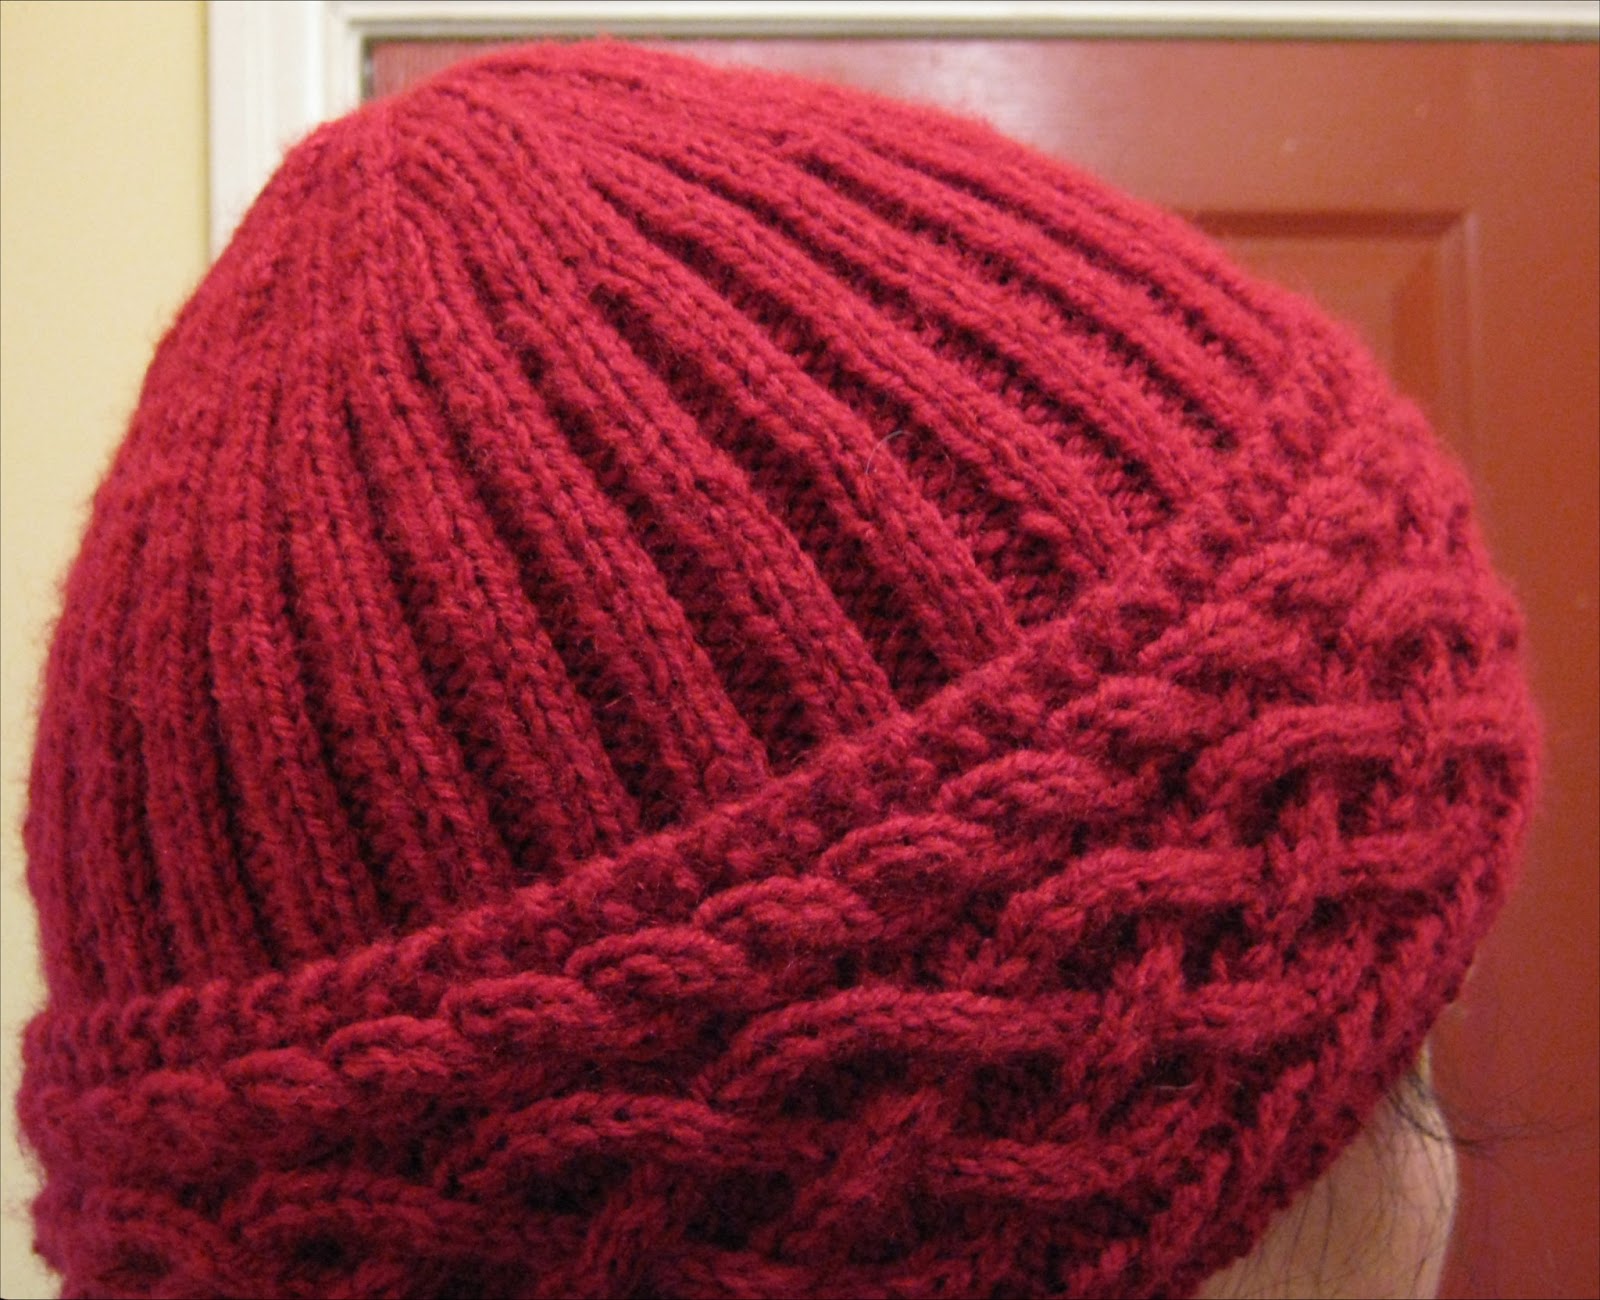
No pattern this time as such, I just wanted to post about the new version of the Celtic Cable Sweater Vest I've recently finished. I was pleased to see lots of interest in this patttern, especially the hat - I'm in the process of making/designing more hats and other accessories, which I'm intending to put on Ravelry later.
This time I used a dark grey marl DK yarn, again unbranded, but possibly Jarol Heritage, a colour I can wear with my red, green and purple tops. I substituted an extended Saxon Braid panel, flanked with double rope cables, with the number of stitches adding up to 54 as in the pattern. Although I had visualised the braid, I found that someone had already worked out the stitch pattern, so I can't really claim it as my own - see The Barrington Braid here.


I made the collar the same as before, with hidden buttons and buttonholes at the front edge of the collar so it can be fastened right up.

Detail of the cable pattern is shown on the right.

Happy cabling!

Tuesday, 26 February 2013

Celtic braid sweater vest and hat


I designed this sleeveless sweater for myself as I had a “bargain bag” of yarn that I knew wouldn’t stretch to a sweater with sleeves, and I’m so pleased with it – I incorporated pockets (to keep my hands warm) and a collar that can be buttoned right up (I hate wearing scarves). The cable pattern looks more complicated than it is – there are only two types of cable, the Celtic pattern I used in the Sweater with shirt collar and cable trim, and a simple rope cable, doubled in the centre of the pattern.
I’m not sure what the yarn is, it could be Jarol Heritage, which is a wool-rich mix. The colour is a beautiful deep red, which for some reason is really hard to photograph accurately with my camera, you’ll just have to take my word for it! I had enough yarn left to make a matching hat – the patterns for both are here.

Materials:

Jarol Heritage DK (55% wool/25% acrylic/20% nylon): 350g for sweater vest, 80g for hat
7 x ½” (12 mm) buttons for sweater vest
Pair UK8/4 mm needles plus one spare.
Pair UK9/3.75 mm needles
Pair UK10/3.25 mm needles
Cable needle
Stitch holders/safety pins

Tension:

22 sts and 30 rows to 4”/10 cm over stocking stitch

Measurements:

Sweater vest to fit 40” to 42” (101-106 cm) bust/chest – actual measurement 44” (112 cm), length 26” (66 cm).
Hat to fit head 23”-24” (58-61 cm) circumference – can be adjusted

Abbreviations:

K
knit
C4B
Slip next 2 stitches onto a cable needle and leave at back of work. K2, then K2 from cable needle
P
purl
st st
stocking stitch
patt
pattern
C4F
Slip next 2 stitches onto a cable needle and leave at front of work. K2, then K2 from cable needle
tog
together
st(s)
stich(es)
inc
increase
T4B
Slip next 2 stitches onto a cable needle and leave at back of work. K2, then P2 from cable needle
dec
decrease
RS
right side
WS
wrong side
T4F
Slip next 2 stitches onto a cable needle and leave at front of work. P2, then K2 from cable needle
in
inch(es)
rem
remaining
yrnc
yarn round needle clockwise

Pattern panel (54 sts)

Row
Rope A
Celtic braid A
Double rope
Celtic braid B
Rope B
1
P1, K4
P3, C4B, P4, C4B, P3
K8
P3, C4F, P4, C4F, P3
K4, P1
2
K1, P4
K3, P4, K4, P4, K3
P8
K3, P4, K4, P4, K3
P4, K1
3
P1, C4F
P1, (T4B, T4F) twice, P1
C4B, C4F
P1, (T4B, T4F) twice, P1
C4B, P1
4
K1, P4
K1, P2, K4, P4, K4, P2, K1
P8
K1, P2, K4, P4, K4, P2, K1
P4, K1
5
P1, K4
P1, K2, P4, C4F, P4, K2, P1
K8
P1, K2, P4, C4B, P4, K2, P1
K4, P1
6
K1, P4
K1, P2, K4, P4, K4, P2, K1
P8
K1, P2, K4, P4, K4, P2, K1
P4, K1
7
P1, C4F
P1, (T4F, T4B) twice, P1
C4B, C4F
P1, (T4F, T4B) twice, P1
C4B, P1
8
K1, P4
K3, P4, K4, P4, K3
P8
K3, P4, K4, P4, K3
P4, K1

Detail of cable pattern

Sweater vest instructions

Back:

Using 3.25 mm needles, cast on 128 sts and work in double rib as follows for 3” (7.5 cm)
1st rib row: K1, (P2, K2) to last 3 sts, P2, K1
2nd rib row: K3, (P2, K2) to last 5 sts, P2, K3
Inc row: Rib 8, (inc in next st, rib 15) 7 times, inc in next st, rib 7 (136 sts).
Change to 4 mm needles and continue as follows, working the pattern panel from the 1st row:
Next row: K41, work 54 sts of patt panel, K41.
Next row: P41, work 54 sts of patt panel, P41.
Continue in pattern as set until work measures 16.5” (42 cm) or desired length to armhole shaping.
Shape armholes: Dec 6 sts at start of next 2 rows, then dec 1 st at each end of the next 7 rows. Dec 1 st at each end of the next 10 RS rows (90 sts).
Continue until work measures 9.5” (24 cm) from start of armhole decreasing, ending with a WS row (26”/66 cm total).
Shape shoulders: Cast off 6 sts at start of next 6 rows. Place rem 54 sts on stitch holder for collar.

Pocket linings (make 2):

With 4 mm needles, cast on 25 sts and work 16 rows in st st. Leave sts on stitch holder.

Front:

Cast on and work ribbing (including inc row) as for Back. Change to 4 mm needles and work 16 rows as for back.
Divide for pockets: K16, K25 from top of pocket lining, turn and, using spare 4 mm needle, st st 39 rows on these 41 sts, thus ending with a RS row. Cast off 25 sts and P to end. Leave rem 16 sts on stitch holder.
Rejoin yarn to sts on main needle and work 104 sts keeping continuity of patt, turn, placing last 16 sts on a stitch holder, and, using spare needle, work 40 rows in patt on these 104 sts. Leave these sts on needle.
Place 16 sts from stitch holder then 25 sts of second pocket lining on left hand needle, rejoin yarn and work 40 rows in st st. Cast off 25 sts.
Keeping the 16 sts on the left hand needle, replace the 104 sts from the main part and the 16 sts from the right hand part back onto this needle (136 sts). Continue in patt as for back until front matches back to armhole shaping.
Armhole shaping and divide for neck: Cast off 6 sts at start of next row, work 58 sts, cast off next 8 sts and work to end.
Cast off 6 sts at start of next row, work to centre cast off, turn and work on these 58 sts.
**Dec 1 st at armhole edge on next 7 rows, then foll 10 RS rows (41 sts). At the same time keep neck edge straight and keep continuity of patt.
Work straight until you have completed 15 rows less than back to shoulder dec (14 rows less on other side of front).
Next row: Work to last 13 sts, place these sts on a large safety pin, turn and work on rem 28 sts. Dec 1 st at neck edge on next 7 rows, then each alt (RS) row 3 times (18 sts).
Shoulder shaping: Cast off 6 sts at start of next and foll alt row, work 1 row. Cast off rem 6 sts.
Rejoin yarn to rem 58 sts and work 1 WS row. Work from ** to complete other side of front, reversing all shapings.

Pocket edgings (both alike):

Sew pocket linings to inside of front. With 3.25 mm needles and RS facing, pick up 40 sts along outside edge of pocket opening and work 9 rows rib as for back. Cast off using a size larger needle.

Button band:

With 3.25 mm needles and RS facing, pick up 52 sts down left side of front opening (right side for a man) and complete as for pocket edgings.

Buttonhole band:

As for button band, but working two buttonhole rows on 5th and 6th rows as follows:
1st buttonhole row (WS): Rib 3, (yarn to back, yrnc, K2 tog, rib 10) 4 times, K1.
2nd buttonhole row (RS): rib as normal, working into the back of the loops made by the yrnc on the previous row.
Note: This method will give you neat holes which are almost invisible in wear, and you should not need to neaten the edges as with other methods. The buttonholes will be big enough for small buttons
Lap buttonhole band over button band at the bottom and stitch to cast off stitches at centre front.

Collar:

With 3.25 mm needles and RS facing, pick up 10 sts from top of buttonhole band (button band for a man). Work across 13 sts from safety pin, reducing to 10 sts as follows: K1, (K2 tog, K2) 3 times. Then pick up 20 sts along front left neck. Work across 54 sts from back neck, reducing to 40 as follows: (K2 tog, K2) 13 times, K2 tog. Pick up 20 sts along right front neck edge, work across 13 sts from safety pin, reducing to 10 as follows: (K2, K2 tog) 3 times, K1. Pick up 10 sts from top of other band. (120 sts).
Work 16 rows rib as for back, starting with 2nd row, then change to 3.75 mm needles and work another 21 rows. At the same time, make a buttonhole at the start of the 10th, 22nd and 34th rows as follows: K1, P2, yrnc, K2 tog, rib to end. Remember to work into the back of the buttonhole stitch on the return rows.
Cast off ribwise using a size larger needle.

Armbands (both alike):

Join shoulder seams. With 3.25 mm needles and RS facing, pick up 140 sts evenly along armhole edge and complete as for pocket edgings.
Join side seams and darn in ends. Press stocking stitch parts only according to ball band instructions. Sew on buttons to correspond with buttonholes.
Below are photos of the various ways of wearing the collar.


Hat instructions

With 4 mm needles cast on 32 sts Work foundation row as follows:
(K3, P4) twice, K4, (P4, K3) twice.
Continue in pattern, using the pattern panel chart but omitting the double rope and Celtic cable B columns and adding 2 K sts at the start of each row as follows:
Next row: K2, [Rope A], [Celtic cable A], [Rope B], K2.
Work in patt until the band is long enough to fit around the head when slightly stretched, ending with an 8th patt row. Cast off.
With 3.75 mm needles and RS facing, pick up 132 sts evenly along one long edge of the band. Work 6” (15 cm) double rib as follows (note: adjust length if you have a smaller head).
Rib row: (K2, P2) to end.
Shape top as follows:
1st row: (rib 10, P2 tog) 11 times (121 sts)
2nd row: (K1, rib 10) 11 times.
3rd row: (rib 6, P2 tog, K2, P1) 11 times (110 sts)
4th row: (K1, P2, K1, P2, rib 4) 11 times.
5th row: (K2, P2 tog, K2, P1, K2, P1) 11 times (99 sts)
6th row: (K1, P2) to end.
7th row: (K2, P1, K2, K2 tog, K1, P1) 11 times (88 sts)
8th row: (K1, P4, K1, P2) 11 times.
9th row: (K2, P1, K1, K2 tog, K1, P1) 11 times (77 sts)
10th row: (K1, P3, K1, P2) 11 times.
11th row: (K2, P1, K2 tog, K1, P1) 11 times (66 sts)
12th row: As 6th row.
13th row: (K2, K2 tog, K1, P1) 11 times (55 sts)
14th row: (K1, P4) 11 times
15th row: (K1, K2tog, K1, P1) 11 times (44 sts)
16th row: (K1, P3) 11 times
17th row: (K2 tog, K1, P1) 11 times (33 sts)
18th row: K1, (P1, P2 tog) 10 times, P2 tog (22 sts)
19th row: (K2 tog) 11 times (11 sts)
Cut yarn leaving a long tail and thread through rem 11 sts, draw up and stitch in place.
Join seam, changing to reverse side for band. Turn back band along picked up join. Work a line of backstitch, from the right side, about ¼” (0.5 cm) from the lower edge to hold in place. Do not pull too tight – the band still needs to stretch!


Wednesday, 20 February 2013

Mitred pocket toddler dress


I designed this little dress and made it in machine washable acrylic yarn, for my granddaughter to wear over a top and tights or leggings. It would be suitable as a sundress if knitted in cotton – I might try it if we ever get any warm weather!
I made the 22 inch size – Elanor is 2½ and quite tall for her age, but by increasing the needle size the pattern would be suitable for the average four-year-old. 
This yarn is Supreme DK from my local B & M store, but any suitable yarn which knits up to the same tension will be fine.

Materials:

100% acrylic DK as follows:
150g main colour
25g contrast 1
20g each contrasts 2 and 3
2 x ½ inch (12mm) buttons
For 22 inch size: Pair each 3.75mm (UK9) and 3.25mm (UK10) needles
For 24 inch size: Pair each 4mm (UK8) and 3.75mm (UK9) needles
3.5mm crochet hook

Tension:

22 inch size: 24 sts and 32 rows to 4 inches measured over stocking stitch on 3.75mm needles
24 inch size: 22 sts and 30 rows to 4 inches measured over stocking stitch on 4mm needles

Measurements:

To fit age 2/3 (3/4)
Sizes 22 (24) inches approx.
Actual measurements:
Chest 23½ (25½) inches
Length 20½ (22) inches

Abbreviations: 

K       knit 
P        purl 
g st    garter stitch (every row K) 
st st   stocking stitch 
tog     together
st(s)   stitch(es)
S1      slip one without knitting
psso   pass slipped stitch over
RS      right side
WS     wrong side
MC     main colour
C1      first contrast
C2      second contrast
C3      third contrast
dc      double crochet
rem    remaining
alt      alternate

Back:

With larger needles and C1, cast on 114 sts and work in g st as follows, joining in contrast colours as required and carrying MC up side of work when not in use: 2 rows C1 (green), 2 rows MC (purple), 4 rows C2 (pink), 2 rows MC, 4 rows C3 (peacock).
Change to MC and, working in st st, continue as follows:
First dec row: (S1, K1, psso, K34, K2tog) 3 times. Work 11 more rows in st st.
Second dec row: (S1, K1, psso, K32, K2tog) 3 times. Work 11 more rows in st st.
Continue in this manner, reducing the number of stitches between decs by 2 each time, until there are 72 sts rem on needle, ending with a WS row.
Note: Work should measure about 11 inches for smaller size, about 12 inches for larger size.
Change to smaller needles and work in g st for waistband as follows: 4 rows C1, 2 rows MC, 4 rows C2, 2 rows MC, 4 rows C3.
Change to larger needles and work 20 rows in MC in st st.
Armhole shaping: Cast off 4 sts at start of next 2 rows, then dec 1 st at each end of the next 5 rows and each following alt (RS) row 3 times, until 48 sts remain.
Work 31 rows straight, thus ending with a WS row.
Divide for neck: K 14, K 2tog, turn, P 15. Working on these sts only, dec 1 st at neck edge on next row. P 1 row.
Shoulder shaping: Cast off 7 sts at start of next row, work 1 row, then cast off rem 7 sts.
Place centre 16 sts on a stitch holder or large safety pin. Rejoin yarn to rem 16 sts, dec 1 st at neck edge on next and foll alt row. Work 1 row (WS facing), cast off 7 sts at start of next row. Work 1 row then cast off rem 7 sts.

Front:

Work as for Back as far as end of armhole shaping. Work 15 rows straight in MC in st st.
Divide for neck: K 17, K 2tog, turn.
Next row: P 2 tog, P to end. Continue to dec at neck edge of each row twice more, then on alt (RS) rows only twice (14 sts)
Work 13 rows straight, thus ending at armhole edge.
Shoulder shaping: Cast off 7 sts at start of next row, work 1 row, then cast off rem 7 sts.
Place next 10 sts on a safety pin. Rejoin yarn to rem 19 sts. Dec 1 st at neck edge on next 3 rows, then on next 2 alt rows.
Work 14 rows straight, then cast off as for first shoulder.

Neck edging:

Join right shoulder seam. With smaller needles and C1 (green), with RS facing you, pick up 20 sts down left side of front neck, K across 10 sts from safety pin at centre front, pick up 20 sts up right side of front neck, then 5 sts from right side of back neck, K across 16 sts from safety pin at centre back neck, and pick up 5 sts from left back neck (76 sts).
Work 3 rows g st. Cast off using larger needle.

Armhole edgings:

Join left shoulder seam for ½ inch only, leaving it open at neck. With smaller needles and C1 (green), with RS facing you, pick up 84 sts evenly along armhole edge. Work 3 rows g st and cast off. Finish second armhole to match.
With MC and crochet hook, work 1 row dc along both sides of left shoulder opening, working 2 chain buttonholes on front, one being on the neck edging and the other about halfway along the shoulder edge.

Pockets (make 2):

Worked in g st throughout.
With larger needles and C1 (green), cast on 44 sts and work as follows, using colour sequence below:
Foundation row: S1, K1, psso, K to last 2 sts, K 2tog.
Next row (RS): K 19, K 2tog, S1, K1, psso, K 19.
Next row: (WS) K
Next row: K 18, K 2tog, S1, K1, psso, K 18.
Next row: K
Continue in this manner, working 1 less st each side of the centre double dec, until 4 sts remain.
Next row: K 2tog, S1, K1, psso
K 2 tog and fasten off.
Colour sequence for pocket:
Foundation row and next row C1 (green), then
2 rows MC (purple)
4 rows C2 (pink)
2 rows MC
4 rows C3 (peacock)
2 rows MC
4 rows C1 (green)
Repeat this sequence throughout.

Finishing:

Press lightly on reverse according to ball band instructions.
Join side seams and sew on 2 buttons to correspond with buttonholes. Position pockets with a cast on edge at the top and stitch in place.